

How I Turned Notion’s CLI + API Into a Conversational Work OS in Claude Code
The ntn setup, the key commands, and the agent runs my whole workspace from the terminal.

This is my Mind Central.
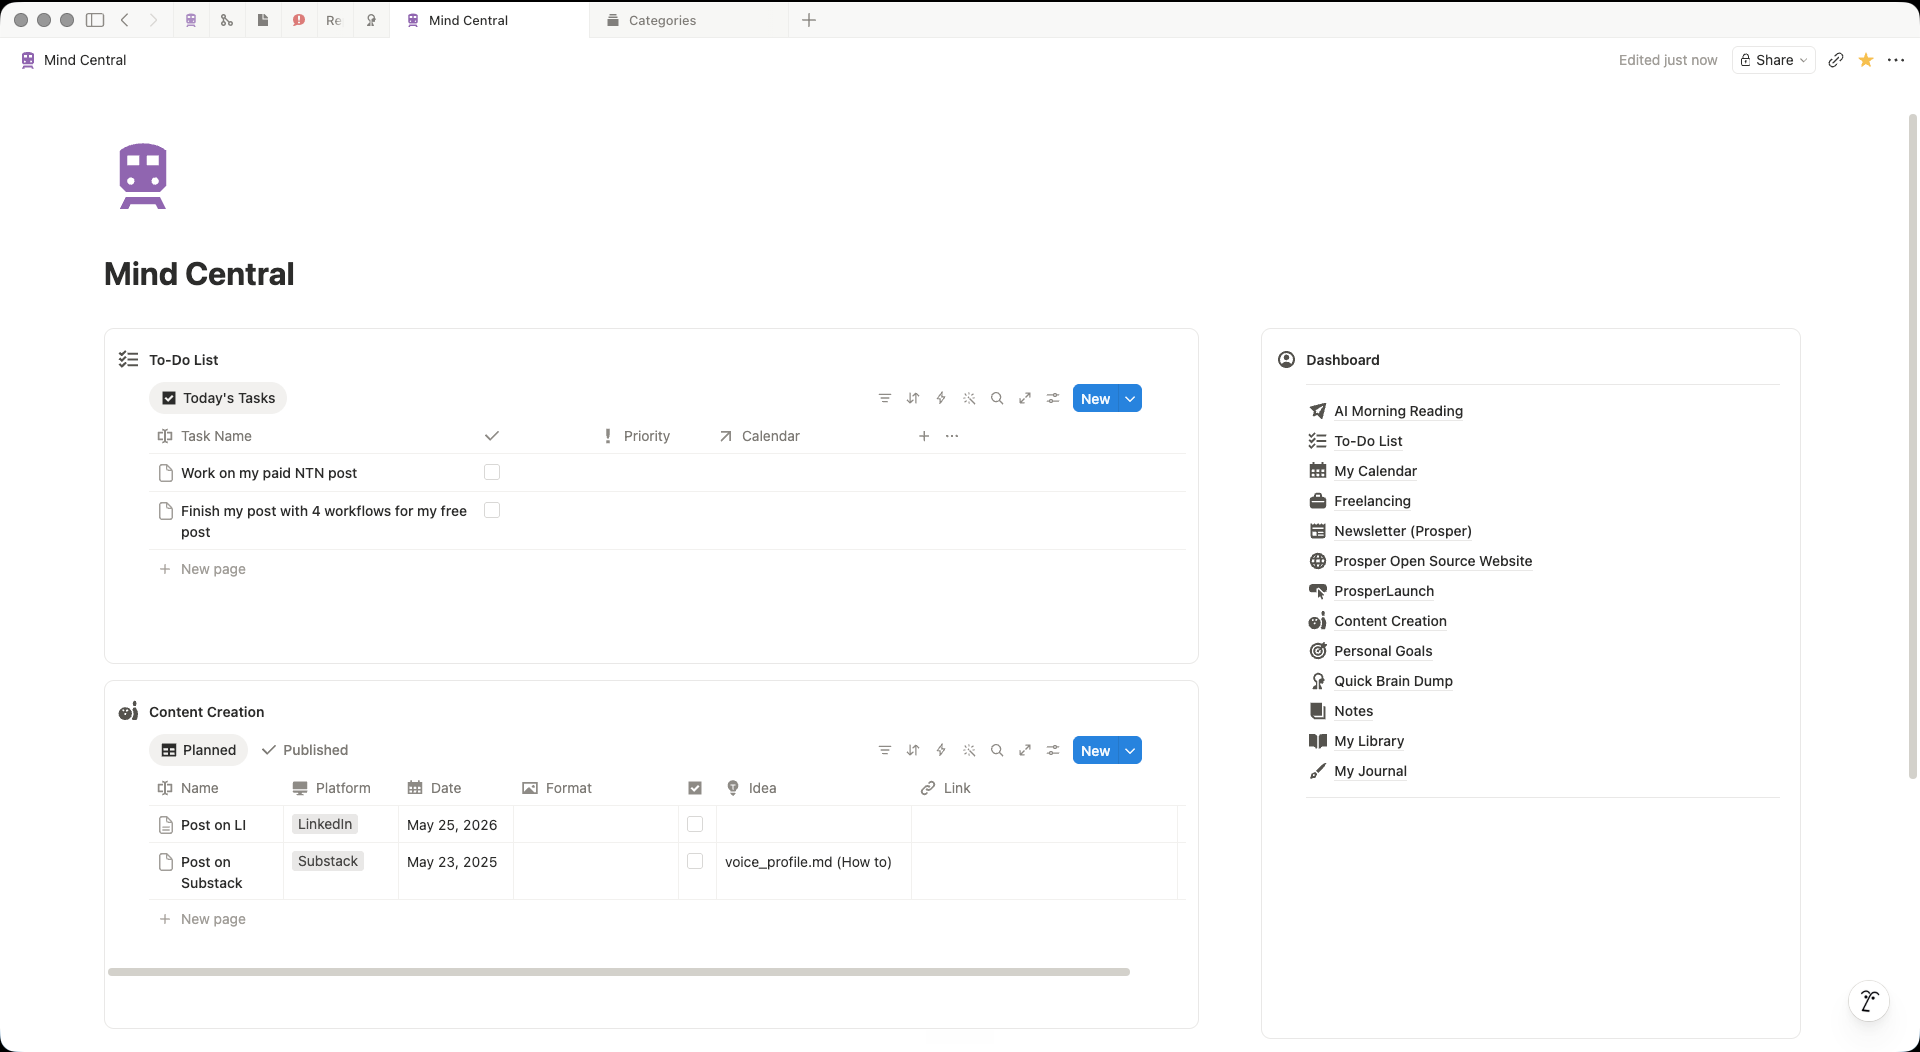
My Mind Central Notion dashboard: linked databases for Prosper, client work, personal projects, and life all in one place.
Everything I work on is in here. Newsletter drafts and content planning for Prosper, client work, my own projects, and life. Everything has its own database, task lists, change logs, and docs. A quick capture page for ideas that hit mid-session. A journal. Personal goals. A library. Literally everything.
A work OS if you will. It has been for years for me.
For years I ran it entirely through the desktop app and my phone. I was opening tabs, reading pages, creating tables, copy-pasting context into Claude every time I needed something from Notion in my session. It worked. But it was friction I didn’t need.
I was the bridge. Claude couldn’t reach Notion. Notion couldn’t reach Claude. Every session, that gap ran through me.
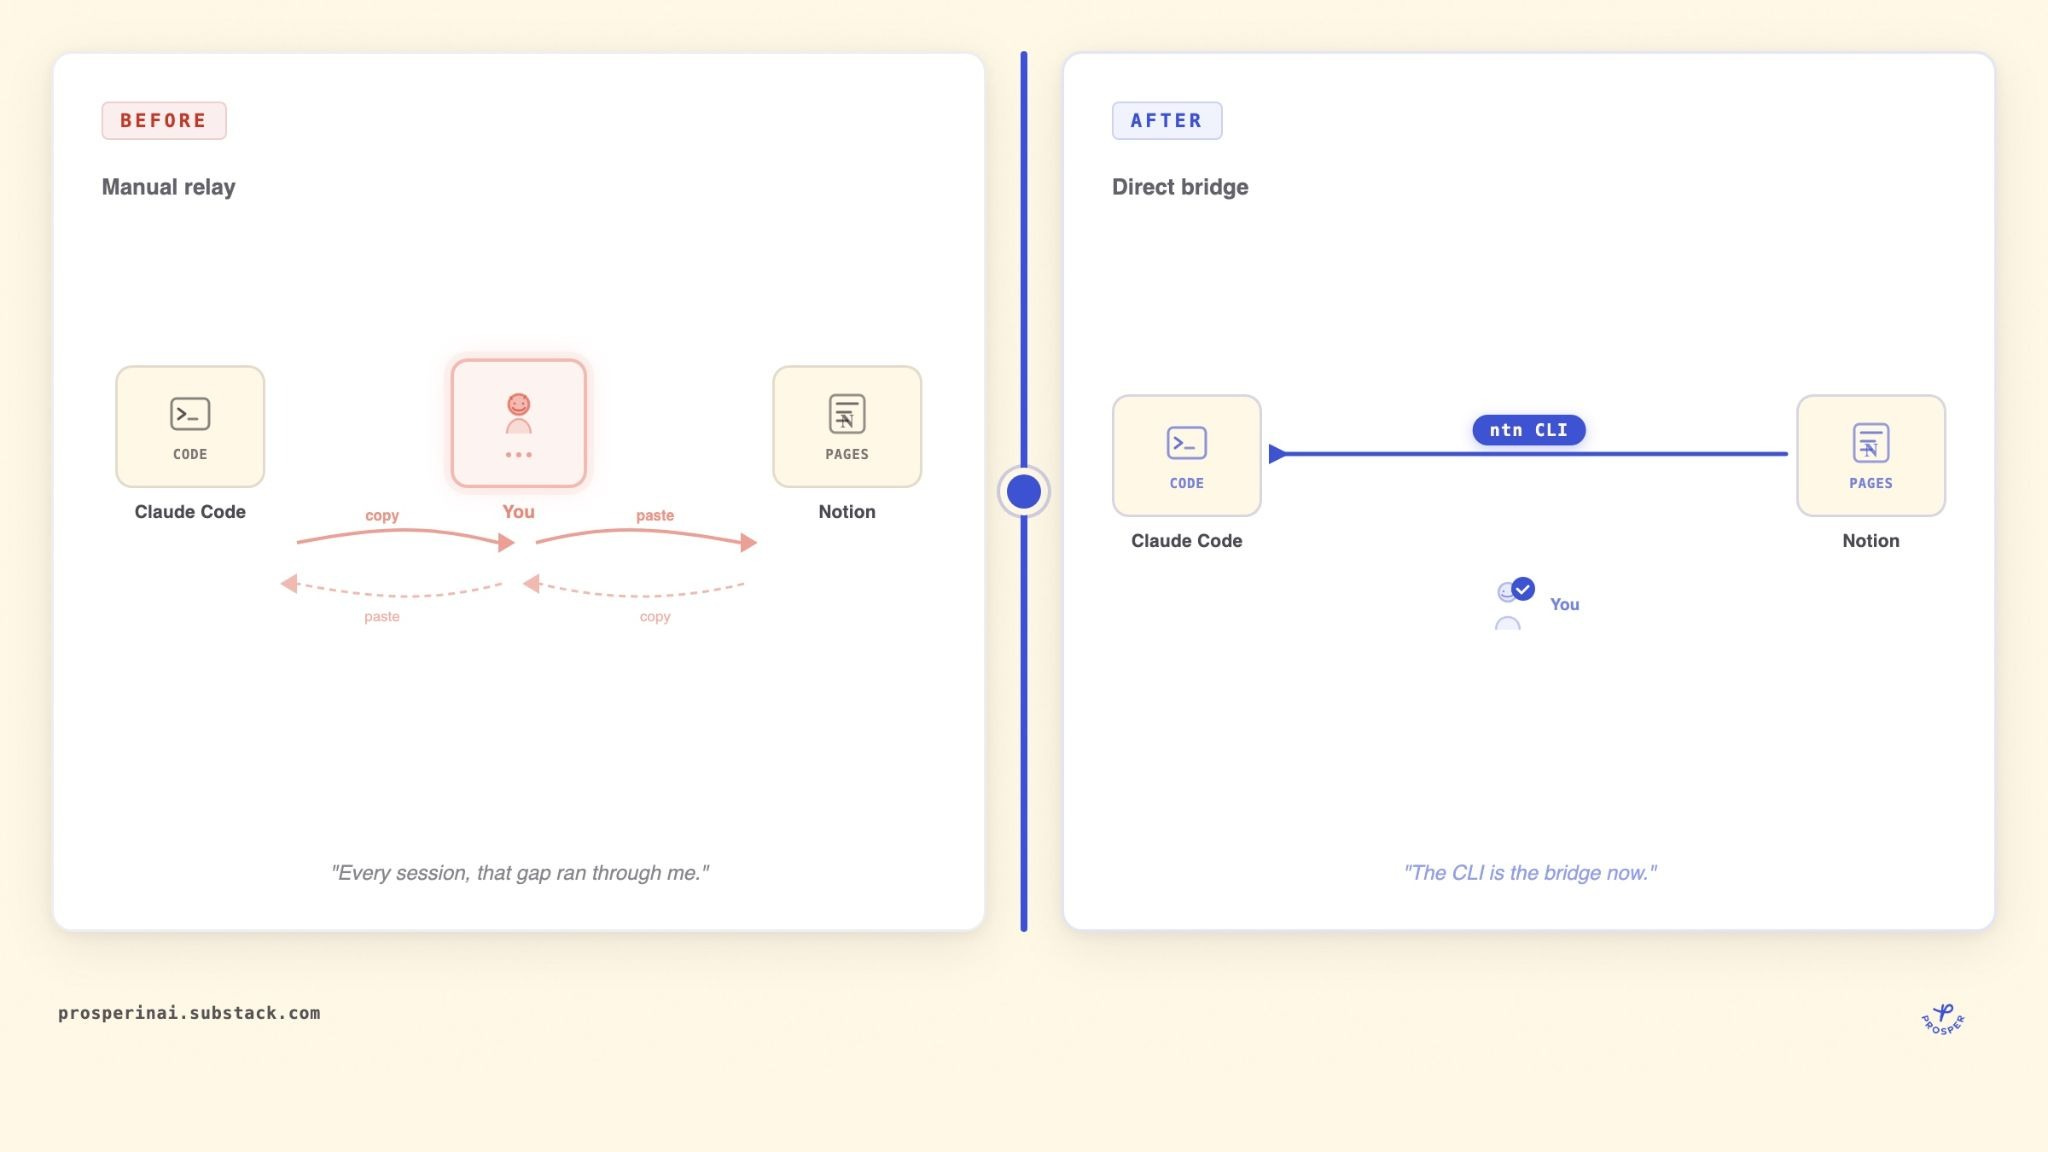
To understand why fixing it mattered, it helps to know what Notion actually is and who’s already built on it.
Why Developers Build on Notion
OpenAI uses it to run operations. Figma builds on it. Vercel, NVIDIA, Ramp. companies that could use anything, and they chose Notion. So that tells you something. They chose it because Notion can hold an entire organization’s working memory: tasks, projects, docs, databases, wikis, all in one place, and it can do it well.
If it works as the operating memory for companies like those, it can work as yours. People have called Notion a Second Brain for years. Tasks, projects, docs, ideas, all structured and searchable in one place. What changes now: you can wire that Second Brain directly into Claude Code, one of the most capable AI models available. Your entire working memory, in the conversation. The CLI is what makes that connection possible.
What Is the Notion CLI (ntn)?
`ntn` is Notion’s official command-line tool. One command to install, one login to authenticate, and your entire Notion workspace is accessible from any terminal, script, or Claude Code session. As of May 2026, it’s in beta at version 0.14.1.
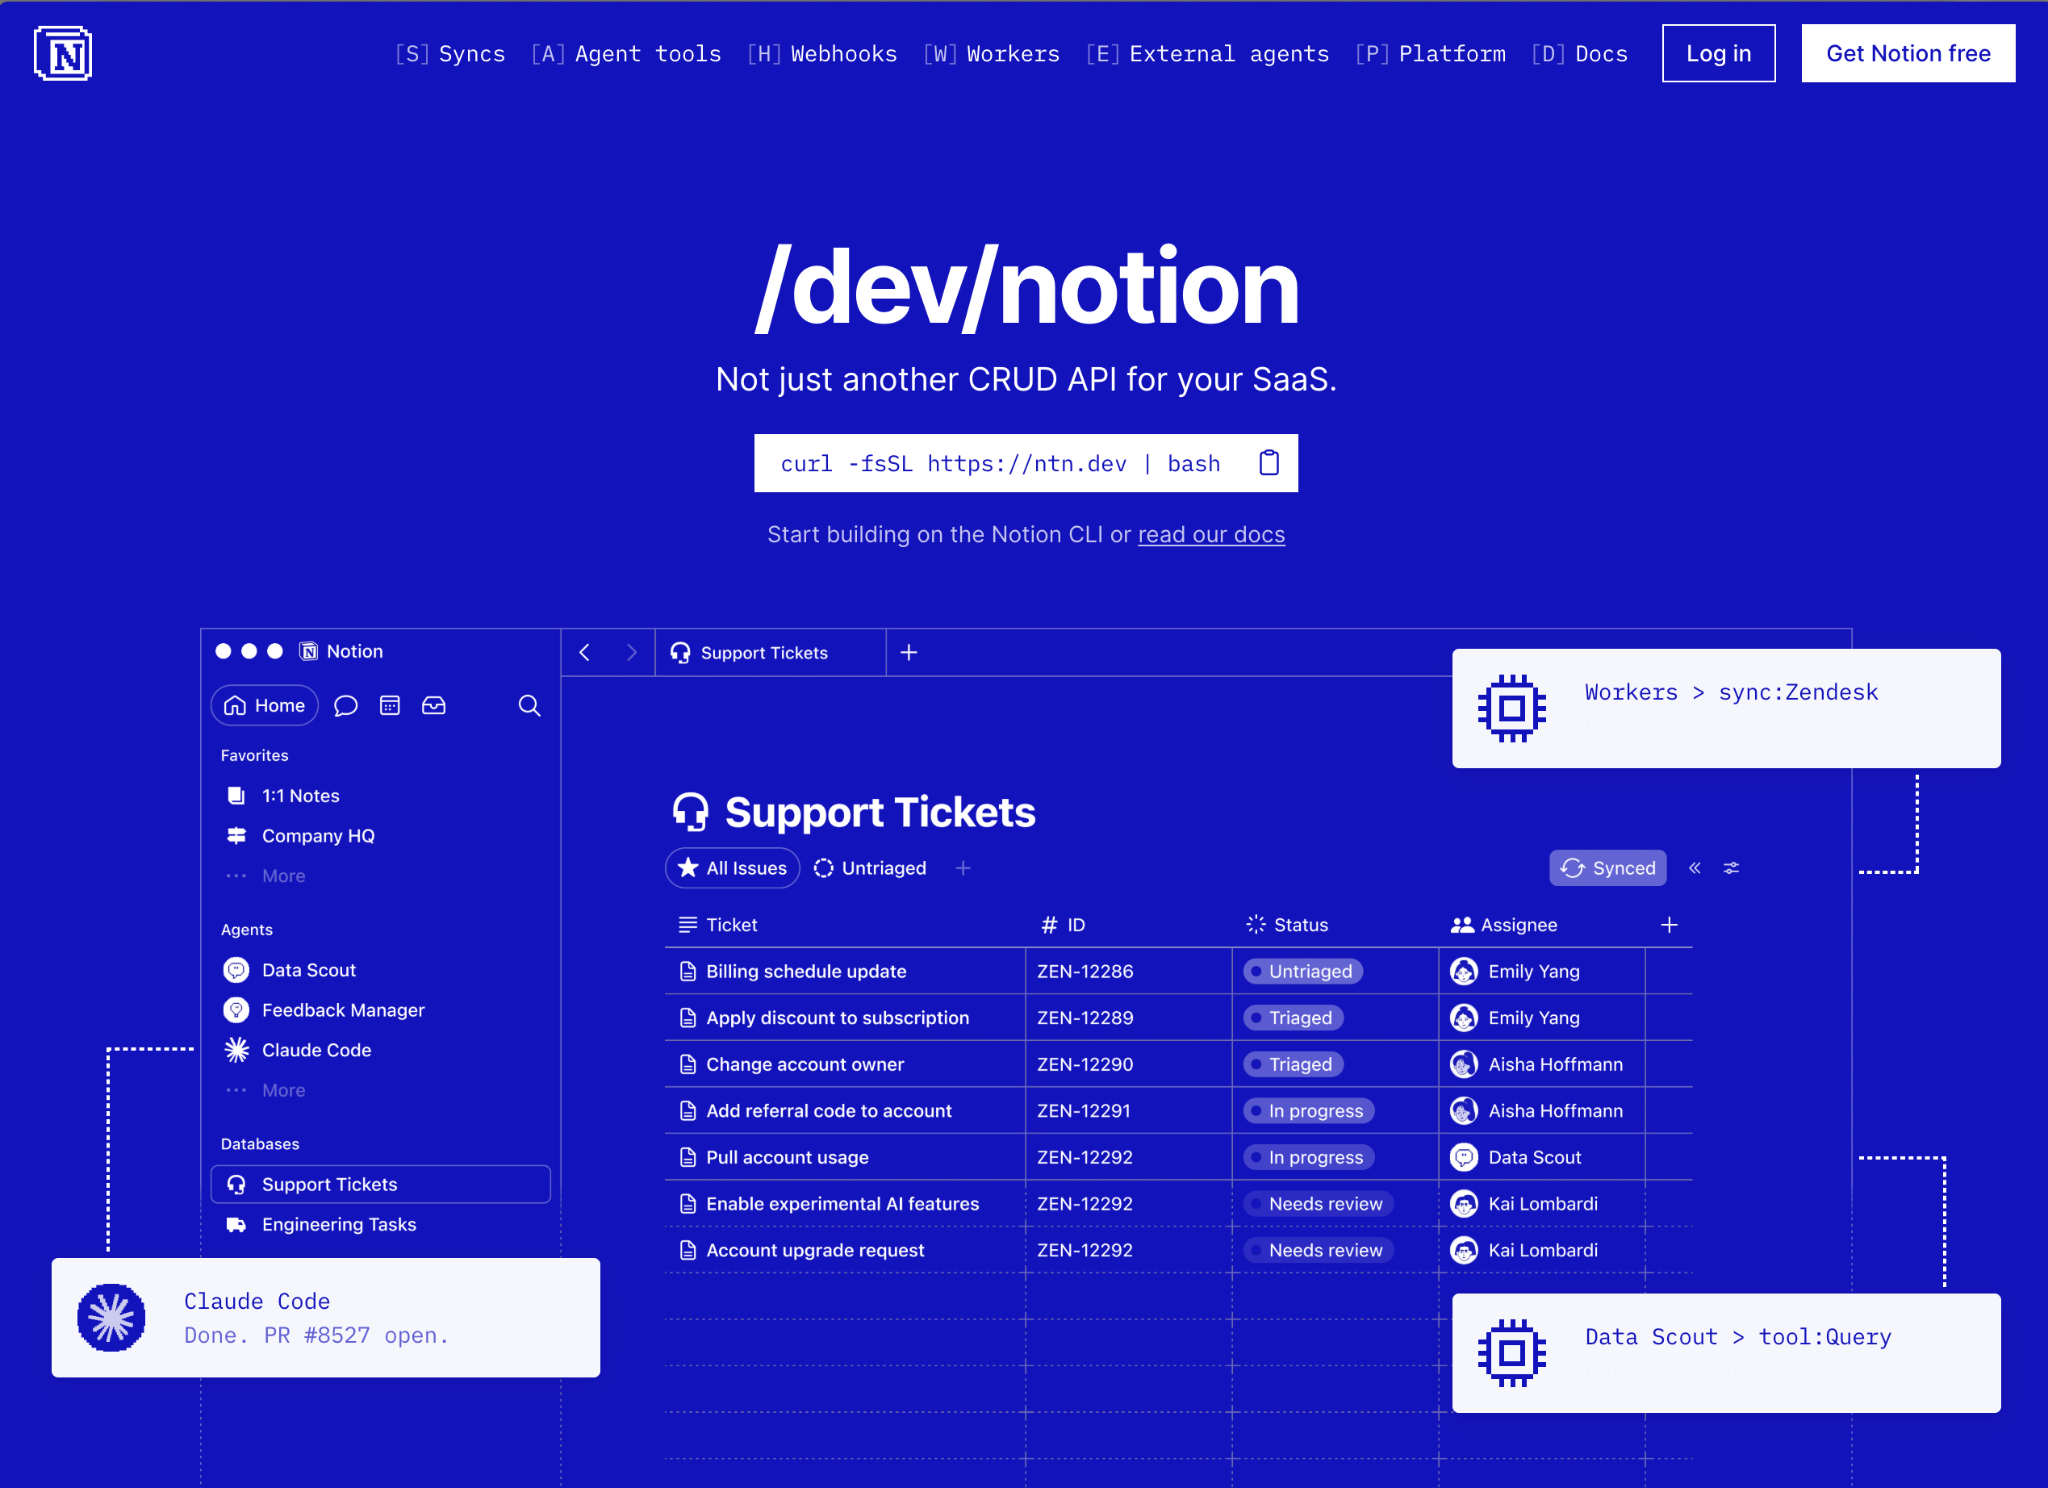
It does one core thing: it lets you talk to your Notion workspace from your terminal.
Install it from ntn.dev. Run `ntn login`. That opens a browser, you confirm a verification code, and your token gets stored in your keychain automatically. You never touch an API token again. Every `ntn api` command after that is pre-authenticated.
What that unlocks: read any Notion page as clean markdown. Append entries to a capture page. Create database rows. Build full databases with typed columns: select, multi-select, date, checkbox. Query your workspace. All from the terminal. All from anywhere: a Claude session, a script, a git hook, a cron job.
What You’ll Have After Reading This
By the end of this post, you’ll have:
- `ntn` installed and authenticated in under 5 minutes
- The key commands for reading, writing, and creating databases in Notion from your terminal with real output from my actual workspace
- The `/notion-checkup` template. An agent running in Claude Code - one skill that reads your entire Notion workspace and lets you interact with it conversationally
- A clear picture of when the CLI beats MCP, and when it doesn’t
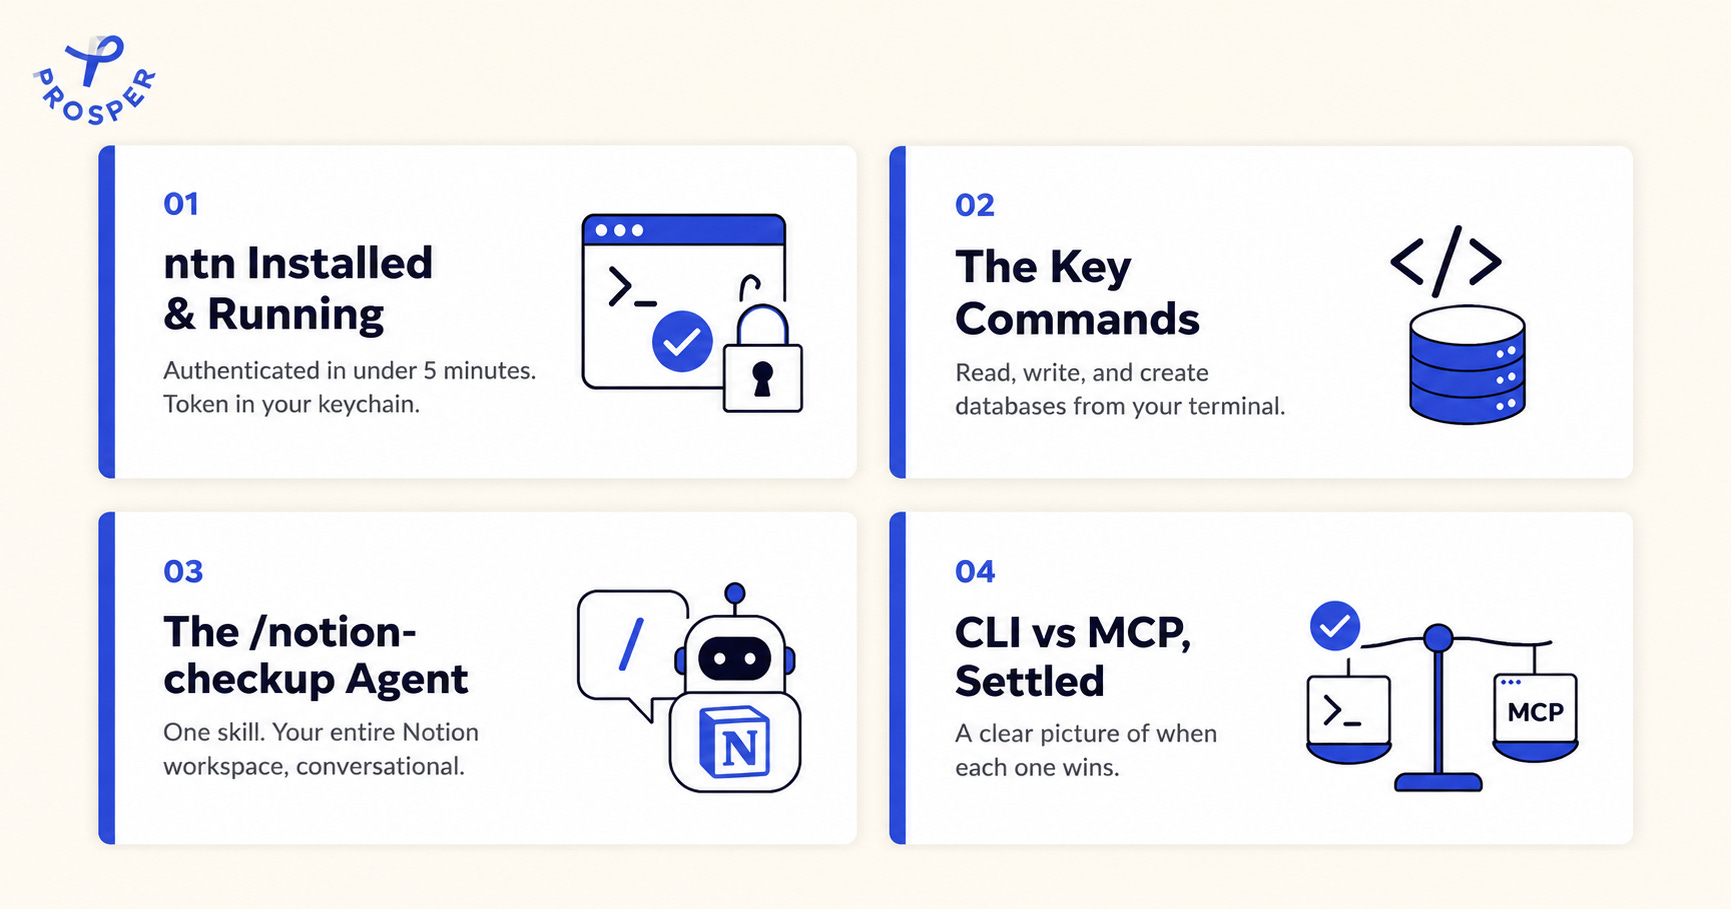
Four outcomes from this post: ntn installed and authenticated, key terminal commands for reading and writing Notion, the /notion-checkup agent for Claude Code, and a CLI vs MCP comparison.
Everything here is something I built and tested against my real Notion workspace. The commands in this post are the actual commands I ran.
One question worth addressing first: if you already have the Notion MCP, do you even need the CLI?
Why I Use the CLI and Not Just the MCP
I have the Notion MCP (Model Context Protocol) installed in Claude Code. Still do. I’ve used it a lot before Notion released CLI. It’s useful inside a Claude session, Claude can read and write Notion natively, no terminal required.
But I kept running into the same limit.
The MCP only works when Claude is running. If I want a script that pulls my task list before I open any app, the MCP can’t help. If I want to save an idea from a Raycast script without starting an AI session, the MCP can’t help.
If you’re curious about running Claude Code from anywhere, including your phone, I covered that in my Telegram bot setup guide:

The CLI can do all of that.
There’s also the usage question. Every MCP call runs through Claude, reading a Notion page means feeding its contents into my context window, which burns through my usage limit. It wasn’t going super well for me. The CLI talks to Notion directly. Claude only sees what I explicitly pass to it.
MCP is the AI layer. It puts Notion inside your Claude session. The CLI is the infrastructure layer. It puts Notion in your terminal, permanently, with or without AI in the loop.
One more thing: `ntn` is Notion’s official tool. The MCP is a third-party integration built on the same API. For anything you want to be reliable long-term, that distinction matters.
The full breakdown is below. But first, here’s what I actually built with it.
What the `/notion-checkup` Agent Looks Like in Practice
The thing I built on top of all this is a Claude Code skill called `/notion-checkup`. It’s a global agent, available in every Claude Code session on my machine. It knows my Notion workspace structure and interacts with it via `ntn`.
When I type `/notion-checkup`, it runs automatically.
For example, look at this image:
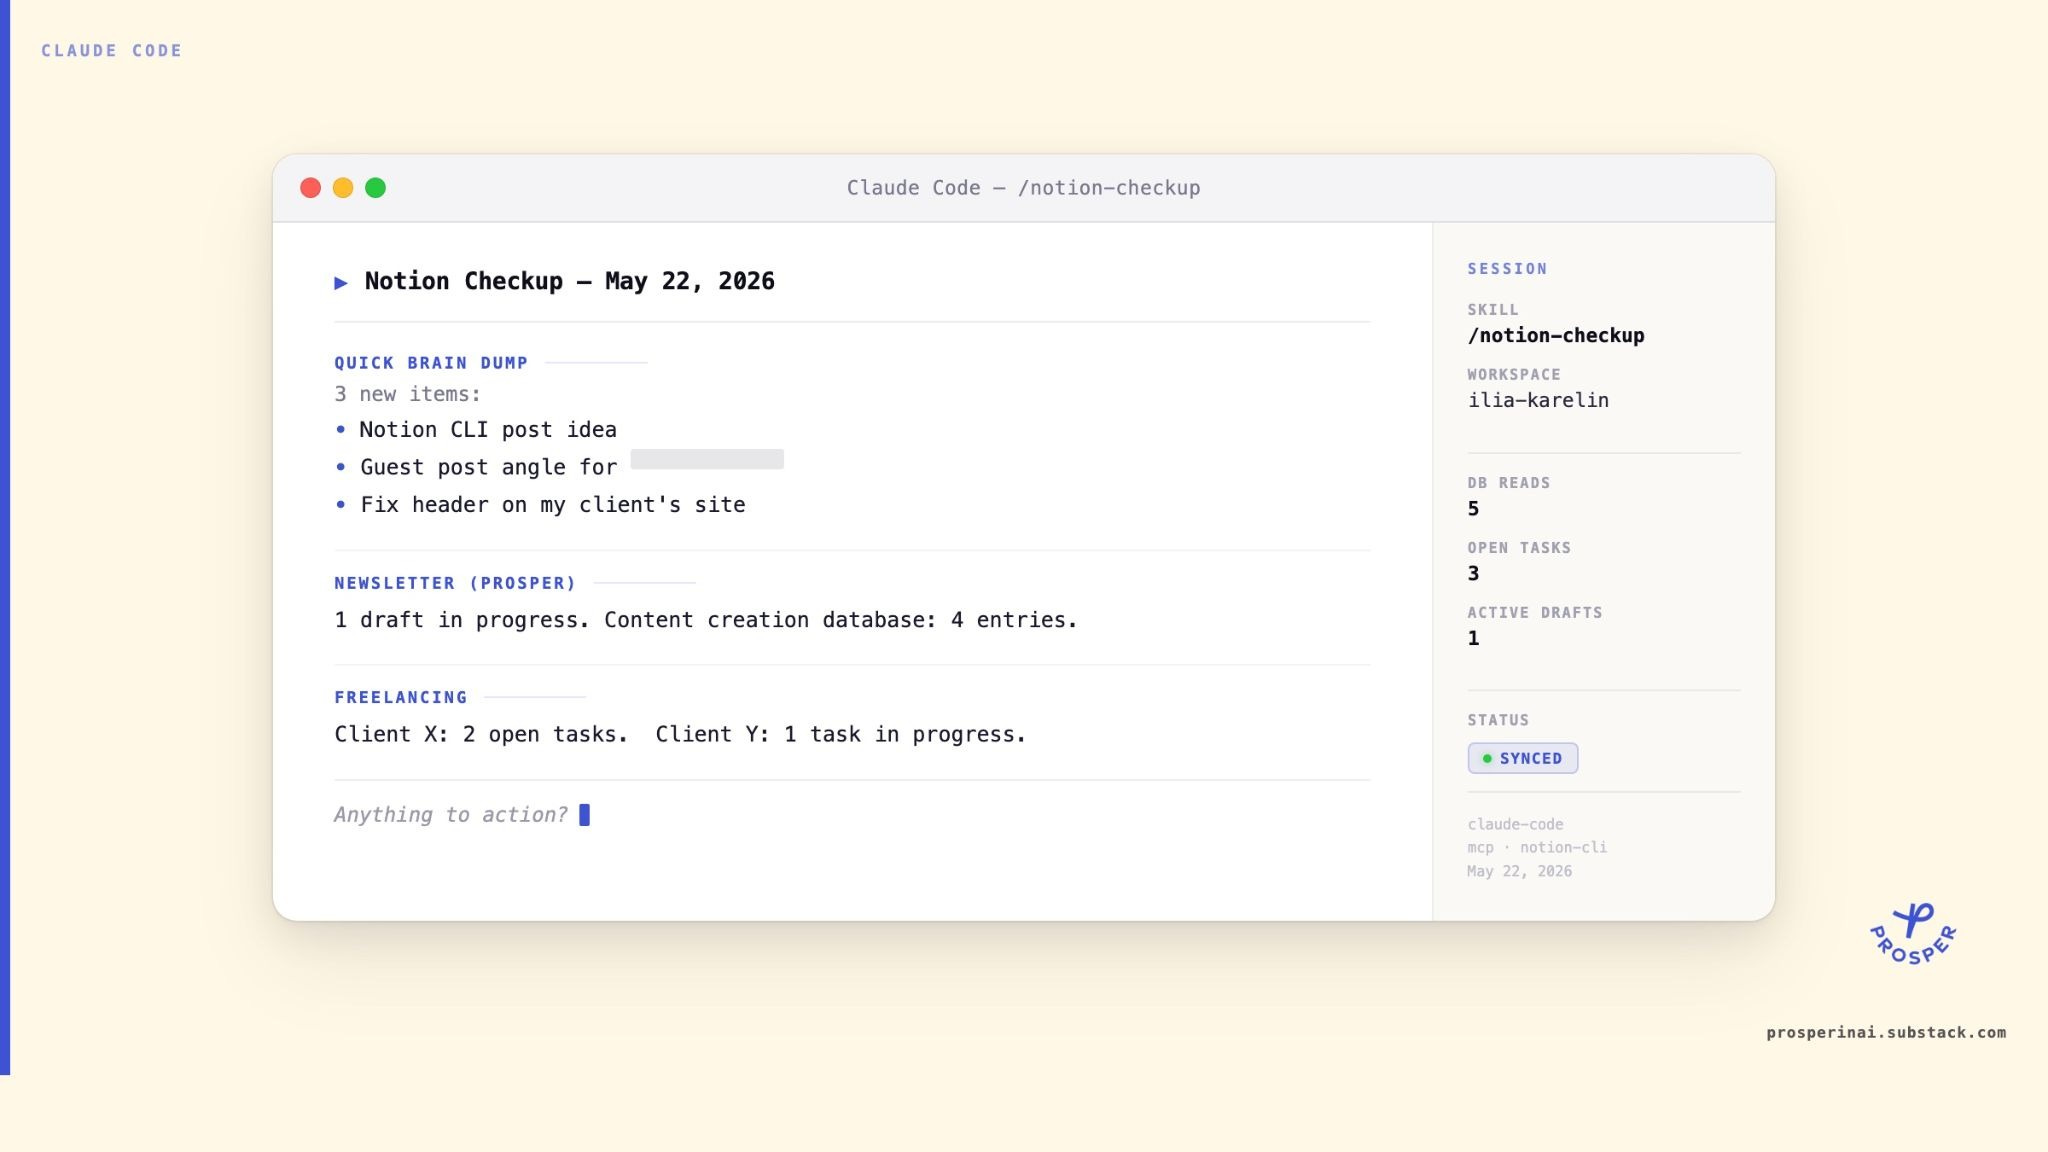
From there it’s conversational. “Log that I fixed the contact form on Client X.” “Save the guest post idea to Content Creation.” “Add a task to Client Y.”
Claude Code runs the `ntn api` command and confirms when done. The best thing about this flow is that once I am done with the task, I can immediately mark it as done in Notion without leaving my Claude Code session.
No browser. No tab switching. My Notion workspace talks back.
The full agent file: the complete skill prompt, workspace map template, and all the `ntn api` commands pre-written comes later in this post. You fill in your own page IDs and drop it in one folder. That's the setup.
Now - the full MCP vs CLI breakdown.
Notion CLI + API vs MCP. The Honest Comparison
You might already have the Notion MCP set up in Claude Code, Cursor, or Windsurf. So why add the CLI?
Short answer: they’re not the same job.
Where they overlap: Both work inside Claude Code, Windsurf, and Cursor.
Where CLI goes further:
- Works without any AI tool: open scripts, cron jobs, and git hooks run it natively
- Notion’s own official tool, not a third-party integration built on the API
- Every API call is visible in your terminal, nothing abstracted away
- No tokens to manage, authentication lives in your system keychain
Here are the differences in a better, visual way:
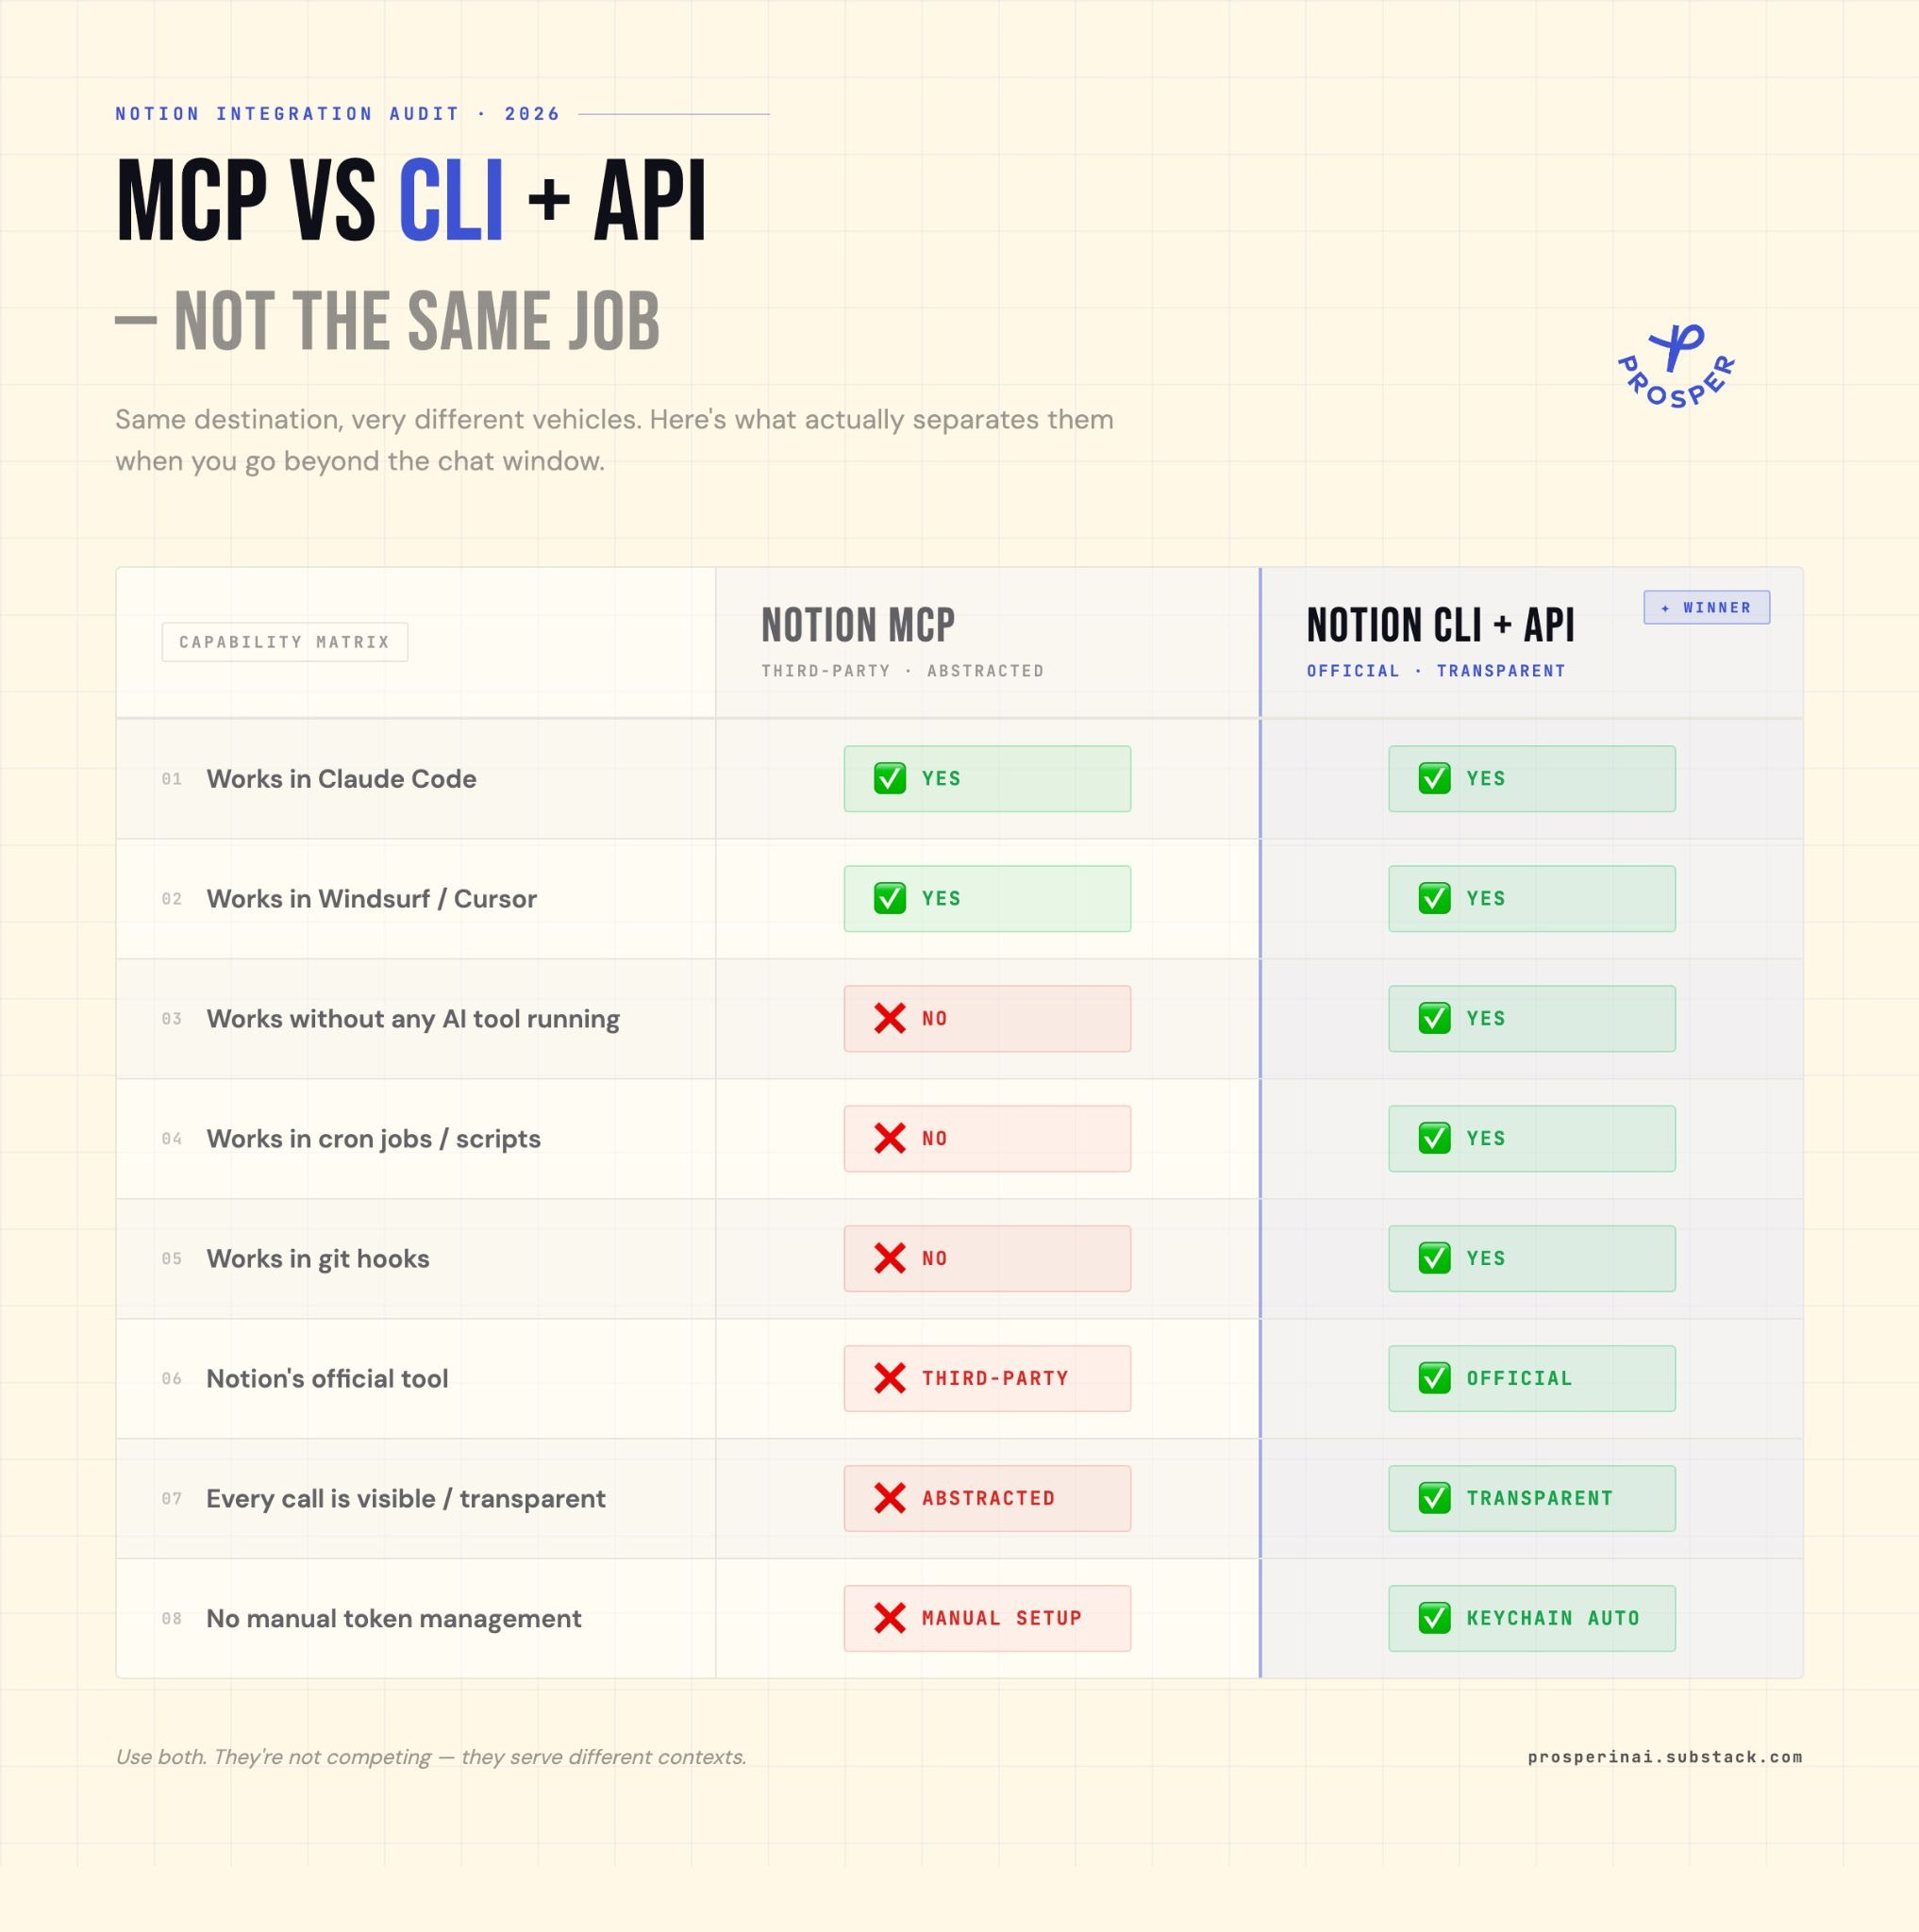
MCP is the AI layer. It lets your AI tool talk to Notion during a conversation. The CLI is the infrastructure layer. It lets anything talk to Notion, with or without AI. The biggest difference I noticed is the token consumption. CLI really didn’t use nowhere near as many tokens as MCP did for me.
One line: MCP is how your AI talks to Notion. CLI is how you talk to Notion.
If you’re using both (fine), MCP handles conversational interactions inside your AI sessions. The CLI handles everything else: automations, scripts, morning checkups that run before you open a single app.
That’s the theory. Here’s what I didn’t see coming.
What Changes When Notion Becomes Conversational
When I set this up, I expected it to be useful for task management. That part works as expected, 100% of the time.
What I didn’t expect: it changed my workflows and how I think about Notion.
Before, opening a work session meant opening tabs. Notion first, then Claude Code, then switching between them as I figured out what needed doing. Now I open Claude Code and type `/notion-checkup`. The agent reads my whole workspace and tells me what’s there and what I need to do for the day. I don’t even open Notion at all unless I want to.
The information came to me instead of me going to get it.
That’s a small shift in behavior. But it’s a big shift in how the two tools relate to each other. It’s totally different how they interact between each other.
Plus on top of that, I can see more and more how Claude is becoming more of an infrastructure that you can build your flows on top of.
The full setup: every command, the agent file, the full walkthrough, is below.
Setting Up ntn (5 Minutes)
Install the Notion CLI
The install part is just one command in your terminal:
curl -fsSL https://ntn.dev | bash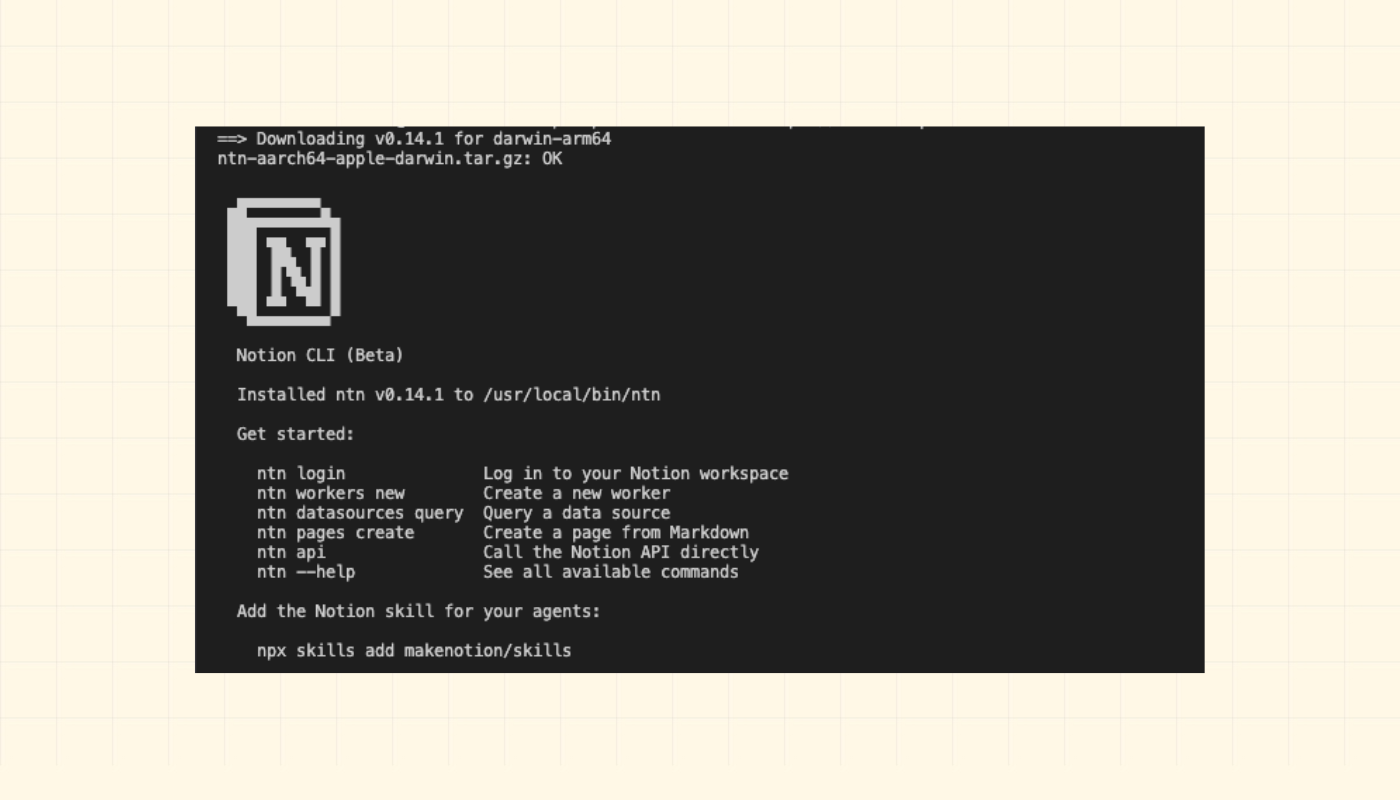
Authenticate
ntn loginThis opens your browser. You’ll see a verification code, confirm it matches what’s in your terminal, click approve. Then back in the terminal:
ntn login pollThat completes the flow. You’ll see: `Logged in to workspace [Your Workspace Name]`
Per documentation, your token lives in your system keychain. You don’t need to look at it again. You never paste it into a header.
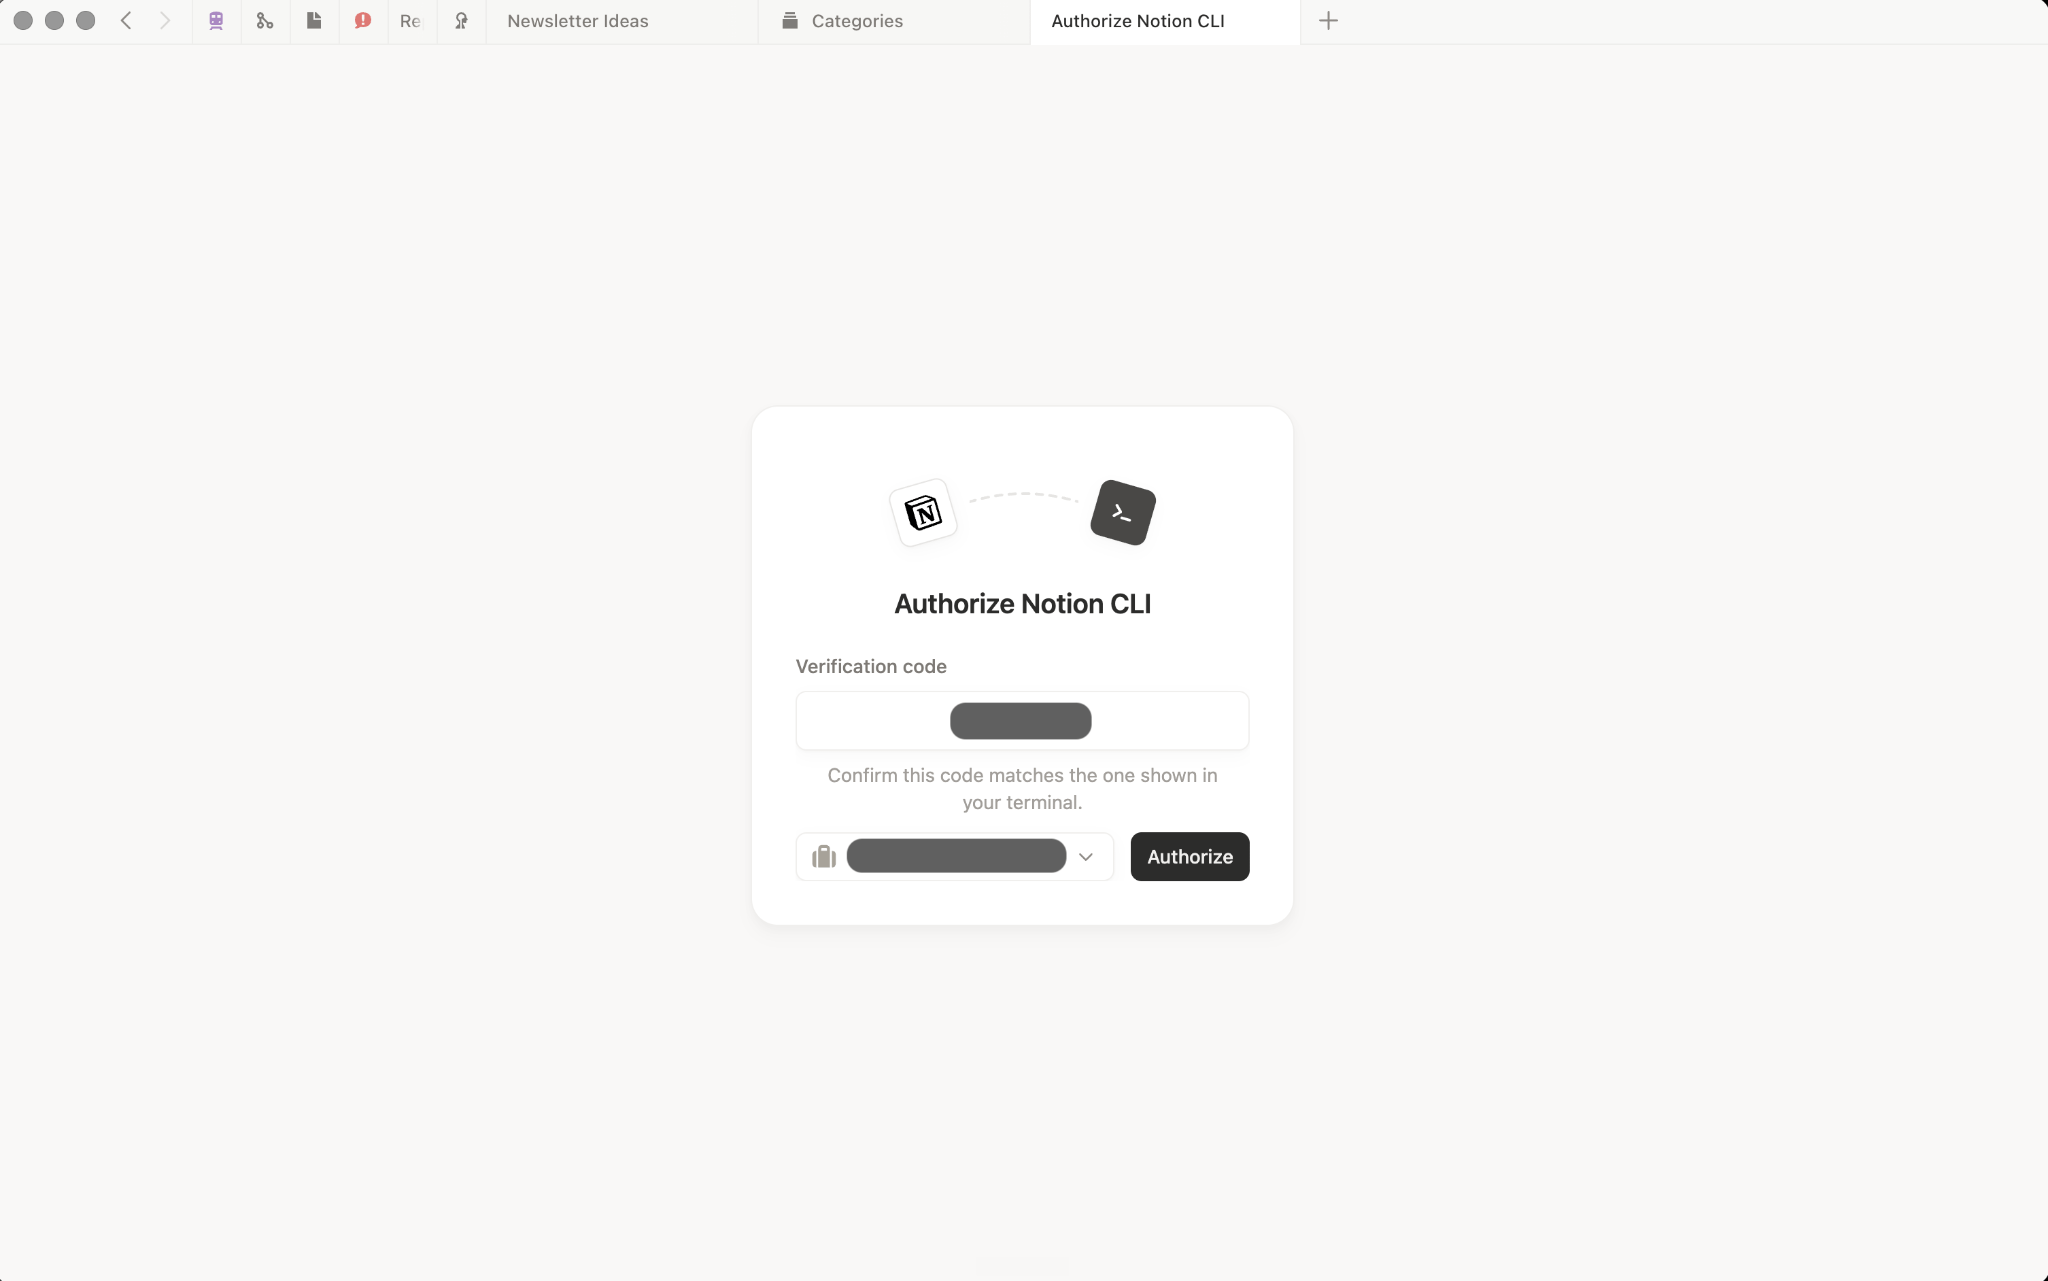
Browser showing the Notion CLI login page with a verification code to confirm against the terminal.
Confirm it works
Run this bash command:
ntn api v1/users/me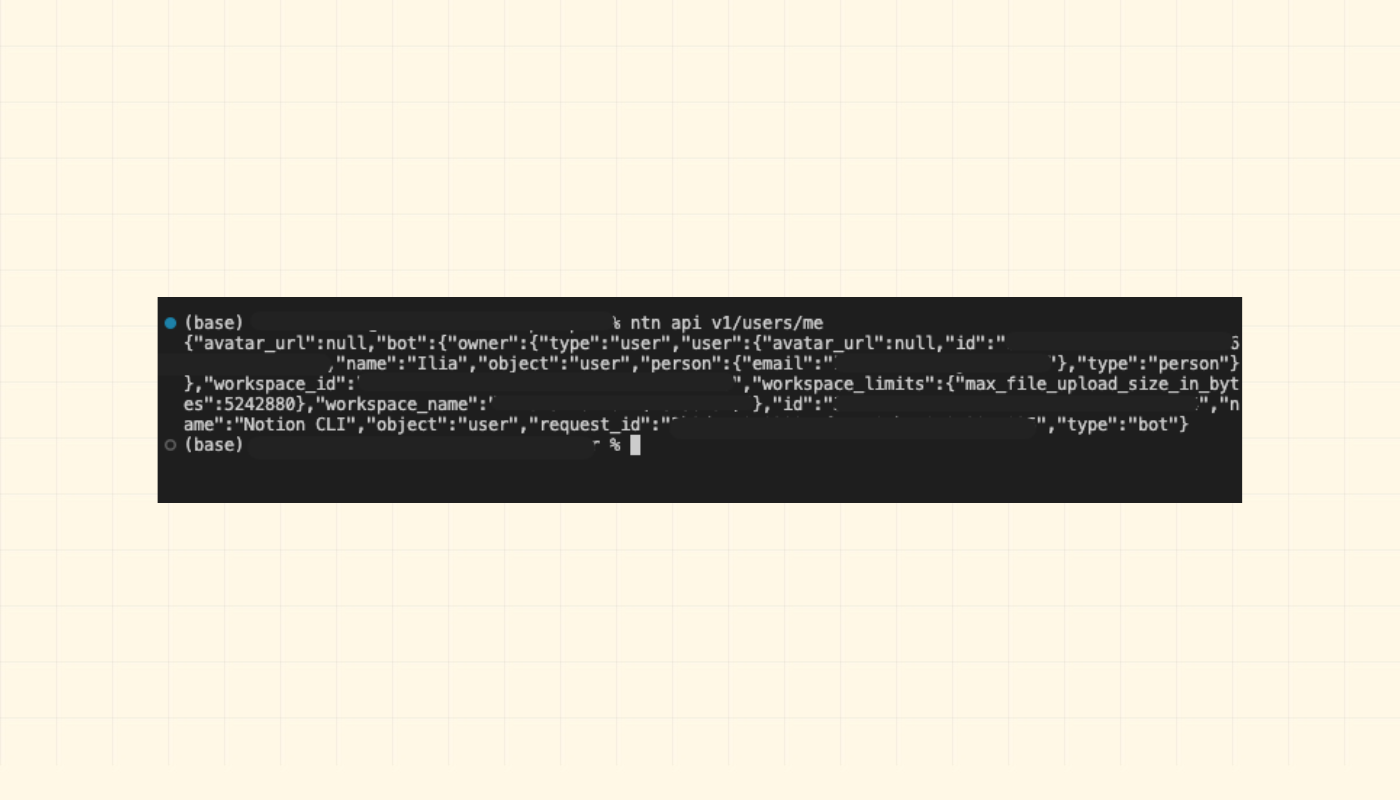
If you see your workspace name in the response, you’re in. Now, let’s move into what you can actually do with it, and I will share what I did with it.
What You Can Do With the Notion CLI
I’ll show you what I tested in a live session: real commands, real output from my actual Notion workspace.
